Roasting coffee is the first job I do before opening the shop, usually while the lift is still empty and the Blue River is running cold outside. I learned the same lesson from coffee that I learned from suspension work: control the variables, write down what happened, and don't trust a shiny gadget to fix a bad process. You can roast good beans at home with a dedicated machine, a heavy pan, or a simple air popper, but the results come from heat control more than clever equipment.
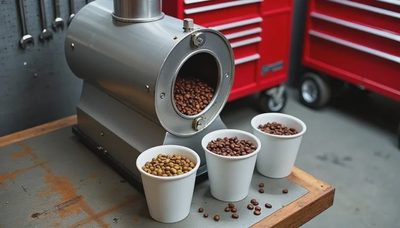
I use a Gene Cafe roaster wedged between my Snap-on toolbox and the alignment rack. It looks out of place until you smell the first crack. Then it makes perfect sense. A mechanic who measures camber to a hundredth of a degree has no business guessing whether a batch is burned. Roasting coffee rewards the same patience as torquing a control-arm bolt: steady pressure, correct sequence, and a record of what you actually did.
Start with green beans and a repeatable setup
Buy green coffee from a reputable specialty supplier and begin with one approachable lot, such as a washed Colombian or a natural Ethiopian. Green beans should smell grassy, sweet, or faintly nutty. They should not smell moldy, oily, or like a damp basement. Store them in a sealed container away from heat and sunlight. Do not refrigerate them; moisture and temperature swings create more trouble than they solve.
Weigh every batch. I normally use 225 grams, which gives enough coffee to judge without wasting half a bag while learning. Keep the batch size consistent because a different load changes how quickly the beans absorb heat. Record the bean name, weight, starting temperature, room temperature, roast time, and finish color. That notebook is more useful than a dozen online arguments.
Ventilation matters. Roasting coffee produces smoke, chaff, and a sharp smell once the beans move toward a darker finish. Use a garage with the door open, a strong exhaust fan, or a dedicated outdoor setup. Never roast beside gasoline, solvent cans, cardboard boxes, or a pile of oily shop rags. A roaster is a heating appliance, not a harmless countertop toy.
The roast has three stages, and each one tells you something
The drying stage begins when the beans enter the roaster. Green coffee contains substantial moisture, so the early minutes are about driving that water out without scorching the outside. The beans shift from green to yellow, then to a pale tan. You will smell hay, grass, and warm bread. If one side darkens while the rest stays green, your heat is too aggressive or the batch is not moving evenly.
The browning stage is where much of the flavor develops. The beans become tan, then light brown, and the smell changes from cereal to caramel, toast, or fruit. This is where roasting coffee starts to feel less like cooking by timer and more like watching a trail rig approach a ledge. You need enough momentum to get over the obstacle, but too much throttle spins the tires.
First crack is the loud, uneven popping caused by steam and pressure escaping from the beans. It can sound like a small handful of rice crisping in a hot pan. Once it begins, stay close. A light roast may finish shortly after the first crack slows. A medium roast generally needs more development time, but the exact finish depends on the bean and the heat curve. Second crack produces quicker, sharper snaps and signals a much darker direction.
I checked. The clock alone could not tell me when a roast was ready. Color, smell, crack activity, and the rate of change had to agree. A roast that reaches first crack at eight minutes is not automatically better than one that reaches it at ten.
Heat control beats chasing a roast profile
For a first batch, use moderate heat and avoid dramatic adjustments. If your roaster has temperature control, increase heat through drying, then reduce it gradually as the beans approach first crack. The goal is to keep the roast moving without letting the outside race ahead of the center. A sudden temperature spike often creates a bean that looks dark but tastes sharp, thin, or smoky.
With a pan, use a thick stainless-steel or cast-iron pan and stir constantly with a whisk or wooden spoon. An air popper gives strong agitation but can roast quickly, so stay beside it and keep a metal colander ready. Do not walk away to answer a phone call. In the shop, that is how a loose brake caliper becomes a roadside story. In the kitchen, it is how coffee becomes charcoal.
The best roasting coffee method is the one you can repeat. If you change the bean weight, heat setting, and cooling method all at once, you will not know what improved or failed. Change one variable per batch. That is basic troubleshooting, whether the complaint is steering shake or a bitter cup.

Cooling is part of the roast, not an afterthought
When the beans reach the color and aroma you want, dump them into a metal colander or cooling tray immediately. Shake the beans and use a fan to move air through them. Remove as much loose chaff as practical, but do not obsess over every fragment. The important job is stopping the cooking. Beans left in a hot drum or pan continue roasting and can move a full shade darker in a minute.
Do not seal hot beans in a jar. Heat and trapped carbon dioxide need an exit. Let the beans cool completely, then place them in a one-way-valve coffee bag or a container with a loose-fitting lid for the first day. Most beans benefit from resting between three and seven days before brewing, although espresso often needs longer. Fresh out of the roaster can taste rough because the coffee is still releasing gas.
How to diagnose a bad cup
A sour, grassy cup usually means the roast stopped too early or the brew was too cool. Try a slightly longer roast before raising the finish temperature dramatically. A bitter, ashy cup usually points to too much heat, too much development, or a roast that went too dark. A baked flavor, flat and dull rather than sharply burnt, often comes from stretching the roast with weak heat for too long.
Grind a small sample and brew it the same way each time. I use a simple pour-over or French press while comparing batches. Change only the roast first. If you alter the grinder, water, dose, and brewing time together, you are diagnosing four problems with one wrench.
Emma's Jeep update: she says my coffee notes look like repair orders, and she is right. Each batch gets a date, bean, weight, roast time, finish point, and tasting note. That record helped me reduce a harsh natural coffee by lowering the heat before first crack instead of blaming the beans.
A practical first-batch procedure
- Weigh 225 grams of green beans.
- Preheat the roaster according to its instructions.
- Start moderate heat and watch the color through the early drying stage.
- Reduce heat as the beans turn tan and the smell shifts toward caramel.
- Listen for first crack and make small adjustments, not panic moves.
- Stop at a light or medium finish before the beans become oily.
- Cool immediately with moving air.
- Rest the beans for several days, then brew a measured sample.
- Write down what you taste and change one thing next time.
Roasting coffee is not complicated, but it is unforgiving of shortcuts. You do not need a $1,500 machine to learn the process. You need heat you can manage, airflow you can trust, and enough discipline to stand there until the batch is done. I have ruined expensive beans by rushing a finish and rescued cheap beans by paying attention. Like a suspension bolt, the result tells the truth. The bolt doesn't lie.


No letters yet — pray write the first.